Mixing and matching bulbs gives a looser, more natural look
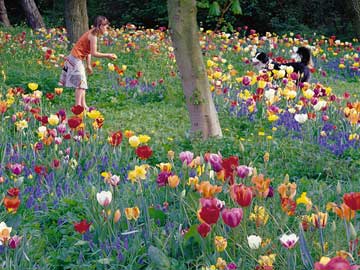
 Spring bulbs can be randomly planted to give a "meadowy" look.
© Netherlands Flower Bulb Information Center
Not all gardeners like a formal look in which flowers are mass-planted in neat blocks or precise, patterned rows. Some prefer a "looser" look with lots of plants, lots of variety and lots of action… something more akin to a meadow than a botanic garden. That approach shows up much more commonly when the plant palette is composed mainly of flowering shrubs and perennial flowers. Bulbs? Not so much.
Spring bulbs such as tulips, daffodils and hyacinths are typically block-planted or similarly massed, mainly because "that’s just how you do it." Those resulting masses of color are impressive. But it’s not the only design option as you lay out a spring garden this fall. (Spring bulbs are best planted from late September through November throughout most of the United States.)
It may sound unnaturally natural, but bulbs can be randomly mixed and matched to produce the equivalent of an early-spring meadow. The look is much like a prairie garden, except the flowers are crocuses, tulips and daffodils instead of penstemon, coneflowers and goldenrod.
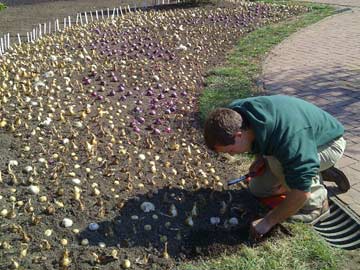
 Plant a bulb meadow by randomly scattering the bulbs and then planting them where they land.
© George Weigel
A good place to start is with a color scheme you like. Do you lean toward bright pairings such as red and gold? Or do you prefer a "cooler" partnership of blues and pinks? Bulbs are available in just about every color imaginable, except black (and some tulips are even close to that).
Next, decide whether you like having all of the bulbs bloom around the same time or whether you'd rather have a succession of color as one type hands off to the next as spring progresses Bulb catalogs and packets list approximately bloom times to help you plan, ranging from the earliest snowdrops and winter aconite to late tulips and June-flowering ornamental onions (Allium). The all-at-once approach gives you a more focused, action-packed show, usually lasting over 2 to 4 weeks. That works well where you’re interplanting your "bulb meadow" with perennials and shrubs and want to have the bulbs finished by the time those summer plants need the space.
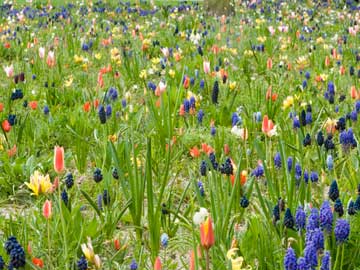
 This bulb planting at the 2012 Floriade in the Netherlands was done randomly, producing the look of spring meadow.
© George Weigel
The second, more spread-out approach gives you less of a one-time "wow" but can provide changeable interest from as early as January into June. Since spring bulbs go dormant in summer, this approach works best either in gardens where the bulbs are behind a planting of summer plants or where you plan to replant the space with summer annual flowers. Either way, planting is done the same way to achieve that natural, "meadowy" look – randomly. Take the types and amounts you've picked and mix them together in a bucket or bin. Then scatter them as you would seed across the prepared bed. Finally, plant them where they land.
One bonus of this approach is that it’s a great way to take advantage of season-ending bargains. Stores often mark down bulb prices to as much as 50 percent off by late fall, but by then, they may only have a few packs of this and a few of that. That’s no problem when you’re trying to be random. Since you’ll no doubt be working with bulbs of different types and sizes, you’ll have to slightly vary the planting depths.
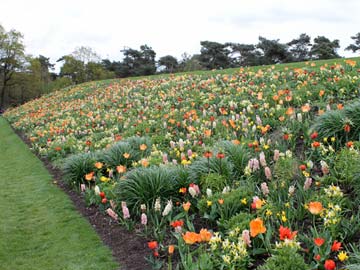
 A variety of bulbs has been planted in this bed at the Netherlands’ Keukenhof public garden to achieve a design similar to a meadow.
© George Weigel
A good rule of thumb is to plant bulbs 3 times as deep as their height. For example, a 2 inch tulip should be planted with its base 6 inches below the soil surface. A 1 inch Siberian squill bulb should go 3 inches below the soil surface. Add your mulch layer into the depth calculation.
Bulbs are best planted in full-sun locations with excellent drainage. Most of them despise wet clay and like slightly raised beds. Improve your soil with compost, rotted leaves or similar organic matter if it isn’t already loose and well draining. It’s always a good idea to run a soil test before planting a new garden to determine if any nutrients are sorely lacking or if the ground’s acidity needs to be adjusted. Work whatever amendments are recommended into the soil before planting. If the test checks out OK, bulbs have all the nutrition they need for the first season and usually don’t need supplemental fertilizer at planting.
However, for best performance in ensuing years, scratch a long-acting fertilizer into the soil surface right after flowering each spring and again early each fall as bulb roots began growing again. Water your bulbs after planting to settle the soil. Then water usually isn’t needed, except if the soil is dry while the bulbs are actively growing. Bulbs don’t need water – and actually prefer it that way – when they’re dormant in summer.
Another way to keep your bulb meadow looking good for years is to avoid cutting the bulb foliage when it’s still green. Green leaves are absorbing sunlight that "recharges" the bulb’s energy for ensuing blooms. Wait at least until the leaves yellow – and ideally until they brown and die back naturally – to cut them.
Not sure you’re going to like the look of a bulb meadow? Start small. Carve out a small bed, scatter a mix, and see how you like it in spring. If you do, you can always expand the planting. If not, right after bloom is an ideal time to dig and rearrange bulbs.